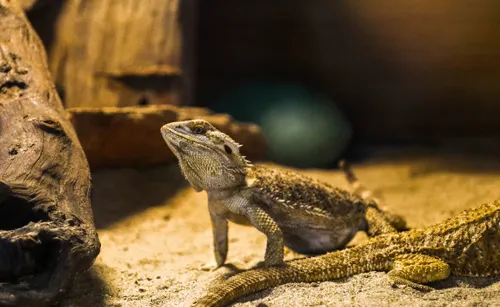
The Complete Bearded Dragon Tank Setup Checklist
A correct bearded dragon tank setup comes down to six things: a 4×2×2 ft (120-gallon) enclosure for an adult, a linear T5 HO UVB tube plus a basking bulb creating a 100–110°F basking spot and a 75–85°F cool end, solid easy-clean substrate, a basking platform and hides, and 30–40% humidity. Buy the gear, assemble it in the order below, run it for 24 hours, and only then bring your dragon home.
One warning before you start: most beginners get at least one of these wrong — and mistake #2 alone accounts for more vet visits than any other setup error. You’ll find all 7 in the mistakes table below; read it before you buy anything.
120 gal
adult minimum tank size
100–110°F
basking spot target
10–12%
T5 HO UVB tube output
30–40%
humidity range
Before you start: the complete shopping checklist
Get everything on this list before the dragon arrives. A half-built tank is how most beginner mistakes happen.
| Item | What to get | Why it matters |
|---|---|---|
| Enclosure | 4×2×2 ft (120 × 60 × 60 cm, ~120-gallon) with a screen top and front-opening doors | Adult minimum size; front doors avoid startling the dragon by reaching in from above |
| Basking bulb | 60–100W incandescent spot in a ceramic-socket dome fixture | Creates the basking spot; exact wattage depends on your room |
| Thermostat | Dimming or on/off, for the heat source | Prevents overheating — every heat source goes on one |
| Ceramic heat emitter | Only if your room drops below 65°F (18°C) at night | Night heat with no light |
| UVB tube | Linear T5 HO, 10–12% output, spanning roughly two-thirds of the tank, with a reflector fixture | Drives vitamin D3 synthesis and calcium absorption; prevents metabolic bone disease |
| Timer | Plug-in timer | Automates the 12-hour light cycle |
| Thermometers | Two digital thermometers with probes | Monitor the basking spot and the cool end |
| Temperature gun | Infrared temperature gun | Spot-checks the basking surface |
| Hygrometer | For humidity | Keeps humidity in the 30–40% range |
| Basking platform | Flat rock, large branch, or slate slab | Positioned under the heat bulb — the dragon’s warm zone |
| Hides | Two (one warm end, one cool end), stable enough not to tip | A retreat at both ends of the gradient |
| Climbing branches | A couple, secured | Exercise and enrichment — beardies are enthusiastic climbers |
| Substrate | Ceramic tile, non-adhesive shelf liner, or paper towels | Zero ingestion risk; easy to spot-clean and monitor droppings |
| Dishes | Shallow water dish and a food dish | Water at the cool end, changed daily; greens in the food dish |
| Disinfectant | Reptile-safe disinfectant | Monthly deep clean |
Safety note before you plug anything in: every heat source goes on a thermostat, and bulbs must be guarded or positioned so the dragon can’t touch them — thermal burns are a real and common injury. Never leave a brand-new setup running untested.
Tank size: what you actually need
An adult bearded dragon needs a vivarium at least 120 cm long × 60 cm deep × 60 cm tall — that’s 4×2×2 feet, roughly 120 gallons, the minimum for a single adult (48×24×24 inches at the very least). Bigger is genuinely better: a longer tank makes the temperature gradient easier to maintain and gives an active adult room to move.
If you’re starting with a baby, a 40-gallon breeder tank works for the first few months — but you’ll be upgrading within the year, so buying the adult-size enclosure once is usually the cheaper move. And plan for exactly one dragon per tank: cohabiting adults fight, breed relentlessly, or bully each other over the basking spot.
For more on enclosures and layouts, browse the habitat and setup guides.
Step 1 — Put the tank in the right spot
Choose a stable surface in a room with a fairly constant temperature, near a power outlet, and away from windows, radiators, and drafts. Direct sun through glass can spike a tank’s temperature fast, and a cold draft fights your heating all winter. Avoid positioning the vivarium where external heat sources can throw off the temperature.
Step 2 — Build the heat gradient
Bearded dragons are ectothermic: they regulate body temperature by moving between warm and cool zones. Your job is to create that gradient, not one uniform temperature.
| Zone | Daytime | Nighttime |
|---|---|---|
| Basking spot | 100–110°F (38–43°C), measured on the surface where the dragon sits | — |
| Cool end | 75–85°F (24–29°C) | — |
| Whole tank | — | Above 65°F (18°C): no extra heat needed. Below: ceramic heat emitter (no light, heat only) on a thermostat |
A note on the numbers: aim for the ranges in the table, not a single magic value — juveniles do best toward the upper end of the basking range. At night, lights off (no colored bulbs); 68–72°F is ideal.
- How: mount the basking bulb in a dome at one end of the tank, directly over the basking platform. Start with a 60–100W bulb and adjust based on your thermometer readings — wattage is trial and error, the thermometer is the truth.
- Control and measure: plug the heat source into a thermostat, and verify with two digital probe thermometers — one at the basking spot, one at the cool end — plus an infrared temp gun for the basking surface. An IR thermometer is the reliable way to check surface temperatures daily.
The deep dive on bulbs, placement, and measuring lives in the lighting, UVB, and heating guides.
Step 3 — Install UVB correctly
UVB is non-negotiable. It drives vitamin D3 synthesis in the skin, which lets the dragon absorb calcium — without it, metabolic bone disease follows.
- Bulb type: linear T5 HO fluorescent tube, 10–12% UVB, spanning roughly two-thirds of the enclosure. Small coil bulbs can’t cover a 4-foot tank.
- Placement: over the basking end so heat and UVB overlap — aim for UVI 3.0–5.0 at the basking zone, near zero in the shaded cool end.
- Mesh and distance: mesh lids filter a significant share of UVB — mounting inside is ideal. Follow your tube’s manufacturer distance chart; safe distances vary by model.
- Schedule: ~12 hours on, 12 off, on a plug-in timer to mimic a natural day.
- Replacement: every 6–12 months per the manufacturer — UVB output fades long before the visible light dims.
Did you know? UVB fades invisibly.
A UVB tube’s output drops off months before the visible light dims. Replace it on the manufacturer’s schedule — not when it “looks dim” — or a dragon can quietly slide toward metabolic bone disease under a bulb that still looks bright.
Step 4 — Choose a safe substrate
For a first setup — especially with a juvenile — use a solid substrate. Zero ingestion risk, easy to spot-clean, and droppings are easy to monitor (changes in stool are often the first sign something’s wrong).
| Substrate | Best for | Drawbacks |
|---|---|---|
| Ceramic or slate tile | Beginners; dragons of any age | — |
| Non-adhesive shelf liner | Beginners; juveniles | — |
| Paper towels | Hatchlings; temporary or quarantine setups | — |
| Soil/sand mix (organic topsoil + playsand) | Experienced keepers; adult dragons only | Impaction risk if ingested; more maintenance |
Why the caution? Juveniles gulp mouthfuls of substrate while hunting insects, and loose material can cause gut blockages. Start solid — you can always revisit substrate once the rest of your husbandry is dialed in.
Avoid for any age: calcium sand (clumps when wet), crushed walnut shell, and wood chips for juveniles.
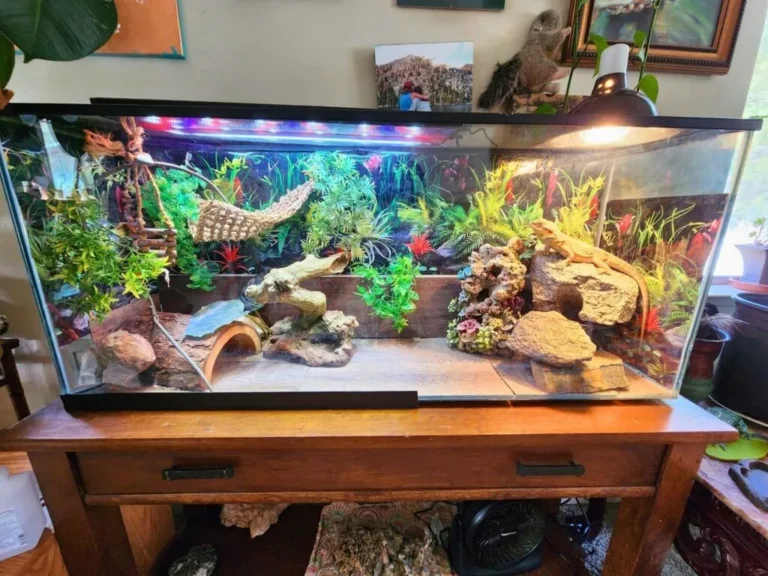
Step 5 — Furnish the tank
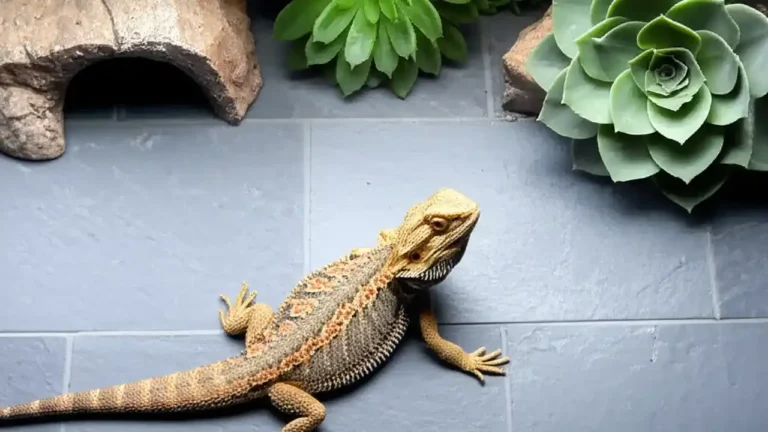
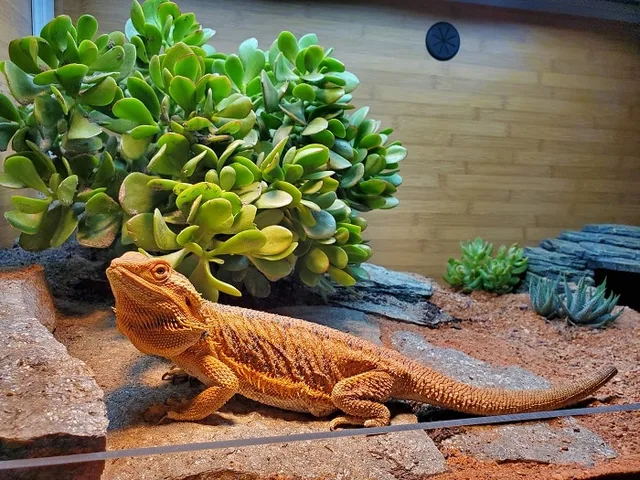
- Basking platform: a flat rock, sturdy branch, or slate slab directly under the basking bulb. This is where your temperature gun should read 100–110°F.
- Hides: at least two — one at the warm end, one at the cool end — so the dragon always has a retreat. They must be stable enough not to tip and injure the animal.
- Climbing branches: beardies are enthusiastic climbers; a couple of secure branches add exercise and enrichment.
- Water and food dishes: a large, shallow water dish at the cool end, emptied and refilled daily, plus a food dish for greens.
- Don’t overcrowd: leave open floor space. A tank crammed with decor defeats the purpose of the 4×2×2 footprint.
Step 6 — Dial in humidity and airflow
Bearded dragons come from arid Australia, and damp air causes skin and respiratory problems. Keep humidity at 30–40%, measured with a hygrometer at the cool end. If it reads high, increase ventilation (a screen top usually suffices) and check that the water dish isn’t under the heat lamp. Low humidity is normal and desirable here; don’t mist the tank to “help with shedding.”
Step 7 — Run a 24-hour test before your dragon arrives
Assemble everything, set the timer, and run the full setup for at least 24 hours before the dragon moves in. Log the basking surface, warm end, and cool end morning, midday, and evening; confirm the gradient holds and the night temperature doesn’t crash. Adjust bulb wattage, dimmer, or platform height until the numbers sit in range. Discovering your basking spot hits 130°F is a problem you want to find with a thermometer, not a dragon.
7 setup mistakes that hurt dragons
| Mistake | Why it hurts | Do this instead |
|---|---|---|
| A coil UVB bulb as the only UVB source | It can’t cover a 4-foot tank evenly | Use a linear T5 HO tube at 10–12% output |
| Heat rocks or unguarded heat sources | Dragons can’t reliably sense heat through their bellies — contact burns are common | Heat comes from above, on a thermostat, guarded |
| A 40-gallon tank “for life” | An adult can’t thermoregulate or move properly in one | 4×2×2 ft (120-gallon) minimum |
| Stick-on dial thermometers | They’re decorative, not instruments | Use digital probes plus an IR gun |
| Loose substrate for a baby | Impaction risk is highest in juveniles | Start with solid substrate |
| No thermostat, no timer | Manual switching fails the first busy week | Automate both |
| Two dragons, one tank | They don’t get lonely — they get injured | One enclosure, one dragon |
Did you know? Belly heat blinds them.
Bearded dragons can’t reliably sense heat through their bellies, which is why heat rocks and heat pads cause burns. In the wild, heat comes from the sun above — so in the tank, it must come from above too, on a thermostat and guarded.
How to verify your setup is working
| Check | Target reading / sign |
|---|---|
| Basking surface (IR gun) | 100–110°F |
| Cool end | 75–85°F |
| Humidity | 30–40% |
| Behavior | Basks for a while, then wanders to the cool end to regulate |
| ⚠️ Never leaves the basking spot | Too cold overall |
| ⚠️ Never basks | Too hot |
| ⚠️ Hides constantly | Check temperatures and whether the tank is in a high-traffic area |
Did you know? Gaping is air-conditioning.
A dragon sitting with its mouth open while basking isn’t in distress — it’s dumping excess heat, the reptile equivalent of panting. Occasional gaping under the basking spot is normal cooling behavior, not a warning sign.
For the full treatment of bulbs, distances, and thermostats, see the lighting, UVB, and heating guides.
Cleaning and hygiene
Spot-clean droppings and uneaten insects as soon as you see them, and do a full clean monthly with a reptile-safe disinfectant, rinsing well afterward. Wash your hands before and after handling your dragon or cleaning the tank — reptiles can carry Salmonella without looking sick, so treat hygiene as part of the routine.
One last thing: if a new dragon won’t eat after a few days of settling in, or shows lethargy, weight loss, or labored breathing, don’t wait it out — contact a qualified reptile veterinarian promptly. Setup problems are fixable; delayed vet care often isn’t.
Frequently asked questions
Can I start with a 40-gallon tank and upgrade later?
Yes — it’s fine for a juvenile for the first few months. But an adult needs the full 4×2×2 ft minimum, so budget for the upgrade (or just buy the adult tank once).
Does my bearded dragon need heat at night?
Usually not. If your room stays above 65°F (18°C), the nighttime drop is natural and healthy. Below that, use a ceramic heat emitter — never a colored bulb, which disrupts sleep.
How long should I run the setup before adding my dragon?
At least 24 hours on the timer, with temperatures logged at several points in the day. Only move the dragon in once the gradient is stable and verified.
What to read next
- Habitat & setup guides — enclosures, substrates, cleaning routines, and enrichment
- Lighting, UVB & heating guides — bulb types, placement distances, and temperature troubleshooting